
How to set a single product template display conditions for WooCommerce in Elementor Pro WordPress builder?
Elementor in its Pro version gives us the possibility to define the appearance of the WooCommerce single product pages according to our own wishes and design. Appearance is defined by the template. A huge advantage of Elementor is that it allows products to be displayed on the same website in several different templates, ie. different templates can be assigned to products depending on the category, subcategory, tag, or author who created the product post. Combinations of inclusion and exclusion are also possible, and the number of templates on one website is practically unlimited.
In this guide, we will not deal with the way in which templates are created in Elementor pro, but only with the way of determining those products to which the previously created template will be applied. The example we will use here is from the Choco Concept integrated Elementor kit.
To get to the Display Conditions setting, you first need to activate the Elementor editor of that template you want to set: WP Dashboard > Templates (1) > Theme Builder (2) > Single Product tab (3) then hover your mouse over the selected template and click the Edit with Elementor (4) link.

When the Elementor editor opens, click the arrow (1) next to the Update button (in the lower-left corner of the editor window). Then select Display Conditions (2) from the menu that opens.

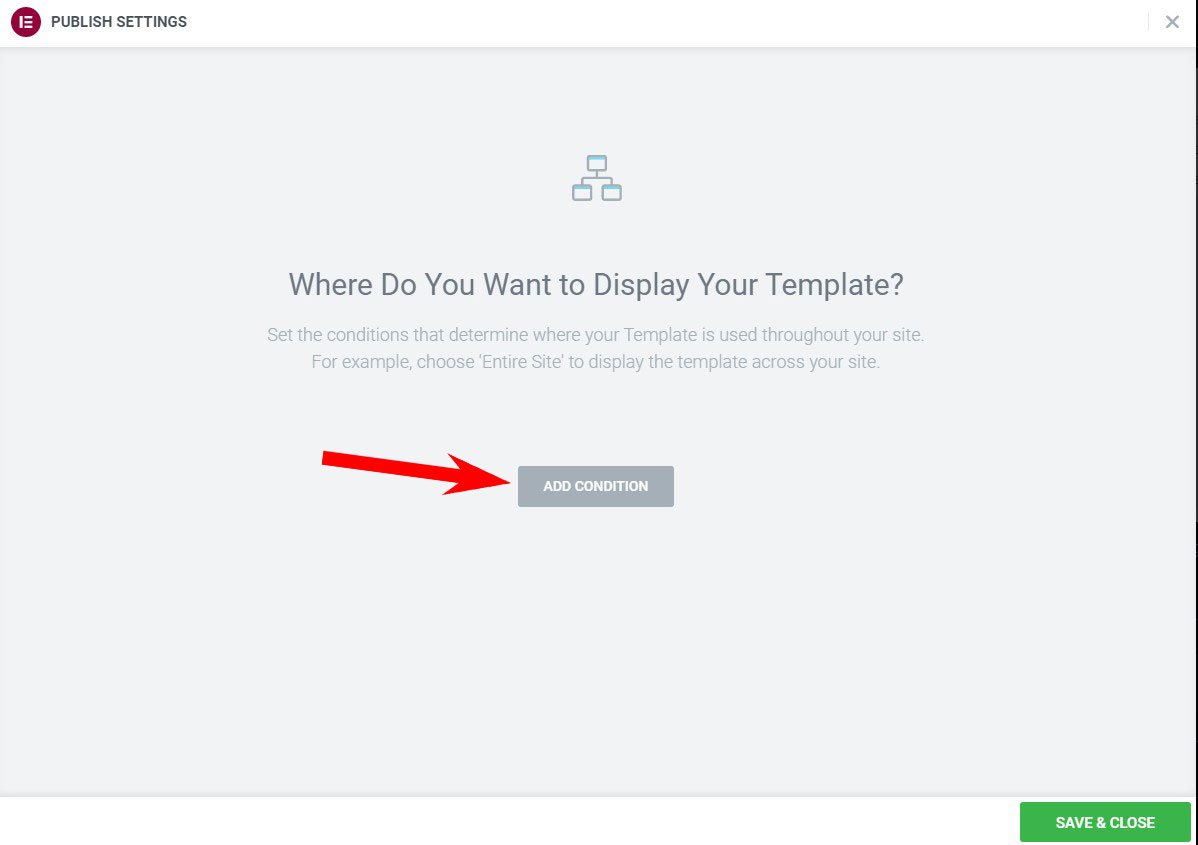
In case so far no display condition has been assigned to the template we are working on, we will be greeted by a screen that clearly invites us to do it by clicking the Add Condition button. We’ll do it.
Each template can have multiple display conditions. These display conditions complement each other and together determine for which products the site will use that template. Each individual condition is in one, its own row.
The first column in each row determines the type: whether that condition is Include type – which includes some products or Exclude type – which excludes some products from the set of products that were previously included.

Of course, it is necessary to start by including products, and later we can exclude some of them.
Whether it is the Include or Exclude type, an individual condition can apply to: all products (Products), or products in categories, or Child Product categories, or products with a specific tag, or products entered by a specific author.
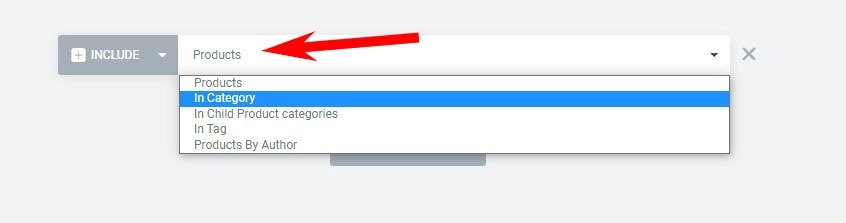
In case you have opted for the Category, Subcategory, Tag, or Author option, the following column will open in which you need to specify your condition. The default option is All, but if you do not want to include or exclude all products with this condition, you need to determine exactly which category, subcategory, tag, or author you mean.

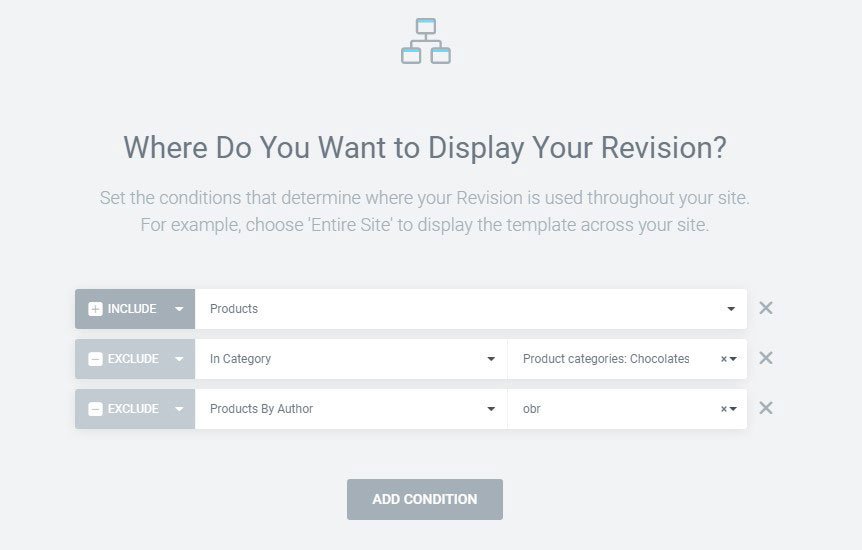
As I have already mentioned, for one template, several conditions can be specified that complement each other in one complex condition. In the following example, I defined that the template is displayed for all those products, which are not in the Chocolates category and which were not entered by the user obr:
Of course, an already entered condition can be removed from the list of display conditions. This is easily done by clicking on the cross to the right of that condition.

When you are satisfied with the display conditions you have entered, be sure to save your work by clicking the Save and Close button.

In the case of setting complex parallel conditions on multiple templates, it can easily happen that these conditions overlap. This is something that should be avoided. Elementor has a built-in mechanism that will alert you to this problem if it detects it. But this is an area where you don’t want to rely entirely on artificial intelligence because the results can be… well, weird. Therefore, it is good advice to make a clear display logic in such cases – and to double-check the conditions you have entered.


