
Experientially speaking, changing the colors of the WooCommerce info bar to global Elementor colors is a process that WordPress developers and designers often need. They need it every time they create an e-shop based on Elementor.
At the same time, this part of the job is not quite easy to do. WooCommerce and Elementor are now both undisputed leaders in their fields. But their development path has been divergent for a long time. Only with recent upgrades, starting with version 3.5 has Elementor Pro given the ability to make the appearance of the last two pages of the WooCommerce store – Cart and Checkout – customized directly in the editor. Instructions on how to do this can be found here (how to customize your cart page) and here (how to customize your checkout page). This allowed developers and designers to more easily match the look of these two pages with the look of the rest of the website.
However, the work does not end there. This is visible as soon as WooCommerce displays the first message at the top of the screen. The Global Elementor colors that you have so carefully specified in the Site Settings section, and which now color both the Cart and Checkout pages – are not valid at all on the WooCommerce info bar.
Perhaps the theme you use gives you the ability to modify WooCommerce predefined colors through Customizer. It is also possible that you have installed some of the plugins that do this. But none of that has anything to do with global Elementor colors. Each time you change the colors in Elementor, you will also have to manually change the colors in WooCommerce. This is what we try to avoid with this guide.
Global Elementor colors – where to set and how to use them
Let’s start with Elementor, which within its theme builder gives us the ability to define global colors. You can access the editor of Elementor’s global colors by clicking on the hamburger icon in the upper left corner (when you are in Elementor editor) then on the Site Settings option, and then on the Global Colors option. This feature is available both in Pro and the free version of Elementor.
These global Elementor colors are available throughout the website as variables. Of all the global Elementor colors, the first four are predefined: Primary, Secondary, Text, and Accent:
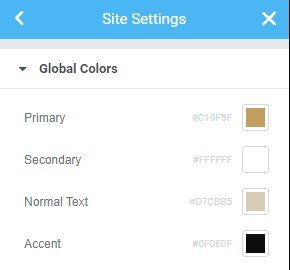
The variables of these four global Elementor colors have the same name on all websites, so I will use them in this guide for that reason. Of course, in your work, you can use all the other colors that you have defined through Elementor’s Site Setting option. You can get the name Elementor gave to the variables for your other colors from the browser, using DevTools (Chrome) or FireBug (FireFox).
The variable names for these four basic global Elementor colors are:
- –e-global-color-primary
- –e-global-color-secondary
- –e-global-color-text
- –e-global-color-accent
I believe it is immediately clear which variable is tied to which color.
In CSS, we can access the values of variables using the var() function. For example, if we want to get the value of a primary global Elementor color, we will use the expression var(–e-global-color-primary).
How do we change the colors of the WooCommerce info bar (and the code needed to do so)
First of all, we need to study the example we are working on in more detail. The example is realistic, taken from the Choco Concept Elementor kit.
Without customization, the information that the cart is updated looks like this:

…and the information that the cart is empty with the button that returns to the Shop page looks like this:
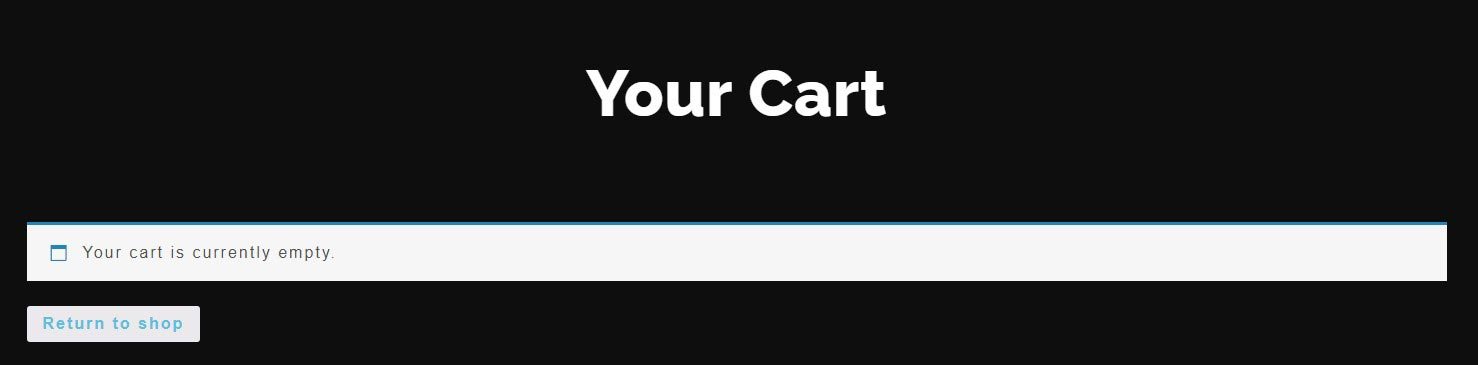
As you can see, the colors of these messages are quite different from the rest of the page and give a bad, unprofessional impression of the site.
The changes I want to make are the following:
- The background of the information should be dark, the same as in the rest of the site (in this case, Accent), and the upper prominent border above the text of the message light brown (in this case, Primary).
- The color of the symbol on the left side of the text should be the same as the color of the top border (ie Primary) and the color of the text itself should be standard (ie Text).
- The button should have a light brown (Primary) background and dark (Accent) text. I also want to remove the default roundness of the corners of the WooCommerce button and make the colors of the buttons inverse when the mouse pointer hovers over them.
As I already mentioned, there is no way to do something like this by simply setting some parameters through the website dashboard. It is necessary to write a custom CSS.
By implementing custom code, I need to change the settings of several WooCommerce CSS classes:
- WooCommerce info bar (.woocommerce-info)
- WooCommerce message (.woocommerce-message)
- WooCommerce button (.woocommerce a.button)
Finally, custom CSS code should look like this to execute the task as it is set up:
selector .woocommerce-message, selector .woocommerce-info {
    color: var(--e-global-color-text);
    border-top-color: var(--e-global-color-primary);
    background-color: var(--e-global-color-accent);
}

selector .woocommerce-message::before, selector .woocommerce-info::before {
    color: var(--e-global-color-primary);
}

selector .woocommerce a.button {
    color: var(--e-global-color-accent);
    background-color: var(--e-global-color-primary);
    border-style: solid;
    border-width: 1px;
    border-radius: 0px;
    border-color: var(--e-global-color-accent);
}

selector .woocommerce a.button:hover {
    color: var(--e-global-color-primary);
    background-color: var(--e-global-color-accent);
    border-style: solid;
    border-width: 1px;
    border-radius: 0px;
    border-color: var(--e-global-color-primary);
}
Of course, this code is just a model for your further work. You are free to download and modify it according to your needs.
Note that this code is prepared for use in the Elementor editor, and therefore contains a tag selector. If you want to use this code directly in the theme (you might want this if you are using the free version of Elementor), you need to remove this tag.
And now, we still need to see how to apply the custom CSS code prepared in this way, for it to give the desired result.
How and where to place the prepared custom CSS code (in Elementor Pro)
This code should be placed wherever WooCommerce messages and information appear. Specifically, these are Cart and Checkout pages, as well as Elementor Theme Builder templates related to WooCommerce: Single Products and Product Archive. Of course, the Cart and Checkout pages are expected to have been previously edited in Elementor – otherwise, they are not available for adding custom CSS this way.
Whether it’s a page or a template, custom CSS is added to Elementor Pro in the same way. First, you need to open the appropriate page or template with the Edit with Elementor option. In the very lower-left corner of the Elementor editor, there is a Settings icon in the form of a gear, which you need to click on. The custom CSS input field is located in the Advanced tab.

When entering or copying pre-prepared code, you need to click the Update button to save the changes.
I suggest you first prepare a custom CSS code and test it on one of the pages, and then copy it to other locations. Note that this custom CSS code applies to the entire page, not to individual widgets in it. This is because of the way WooCommerce works. This is also the reason why this CSS code is added to a page or template, and not to some element inside.
The result: The WooCommerce info bar is then displayed in global Elementor colors
When all of the above is done properly, the WooCommerce info bar from our example should display like this:

The WooCommerce message bar and button to return to the shopping page are also displayed in global Elementor colors:

And finally, the same thing – but the button is in hover state:

Now you can change any of here used global Elementor colors in Elementor Site Setting. Those changes will immediately be automatically reflected in the WooCommerce info bar and the WooCommerce message bar.


